A perfect tattoo is one that is done with perfect technique. This means that your client not only gets a design that looks great on their skin, but also a long-lasting tattoo that has no healing issues.
If you’re new to tattooing, it can be difficult to know exactly how to create a “perfect tattoo.”
That’s why, in this article, we’ll be breaking down the three keys you must have:
Three Keys to a PERFECT Tattoo
The three keys to a perfect tattoo are your stencil, line work, and shading.
1
Long-Lasting Stencil
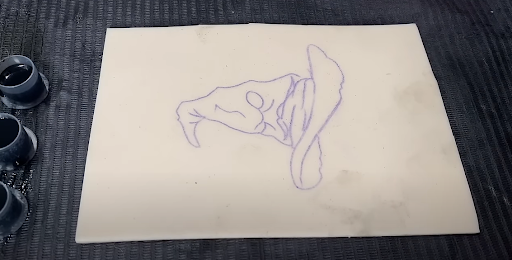
Before you even get into the tattooing process, you need to make sure that you have a solid stencil. Without one, you won’t have any idea what you’re doing during your tattoo.
You want your stencil to be crisp and dark enough that it’s easy to follow. This means:2
Crisp Line Work
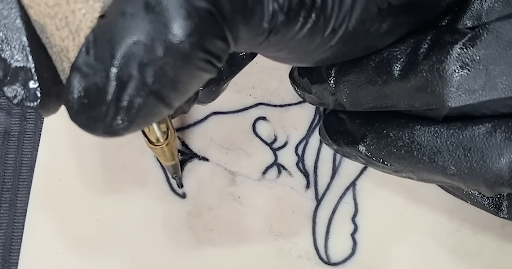
Your line work is what holds everything together when it comes to a tattoo. (Realism is the exception to this rule).
For a traditional tattoo, your line work needs to be on point, or you'll be able to clearly see any mistakes or wobbles in your lines.3
Well-Saturated Shading
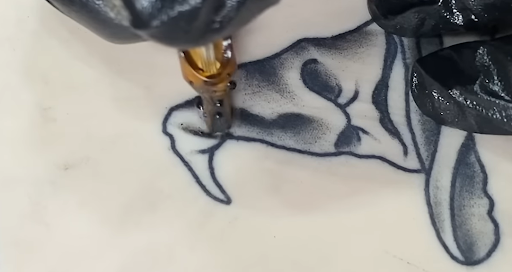
What type of shading you use in your tattoos will depend on the style. For example, in realism or black and gray, you’ll want ultra-smooth shades. In a traditional tattoo, you’ll want nice pepper shading the whole way through.
Shading allows you to add depth to a design, so it’s important that your dark and light areas are in the correct spots. Additionally, in the light areas, you’ll want to use skin breaks. If you don’t have any skin tone in your tattoo designs, the tattoo will look heavy and dark on your client’s skin.Perfect Tattoo Tutorial
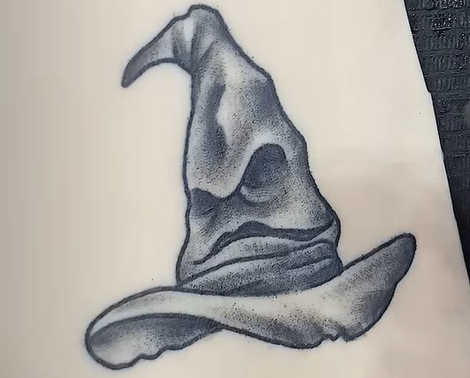
When you’re practicing tattooing, we recommend picking designs you enjoy tattooing. When you’re tattooing clients, you will need to tattoo designs they like. But on fake skin, you can choose something fun or exciting that makes you more motivated to practice.
Print off Your Design and Map Out Your Shading
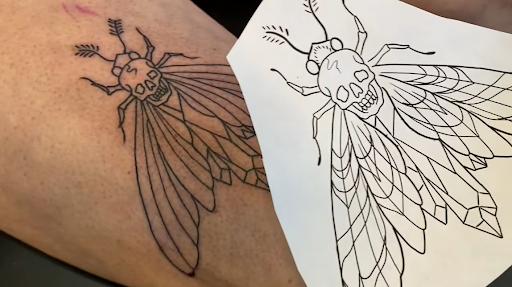
If you’re new to tattooing, you want to make sure your shading is going to end up in the right place - even if some of the stencil gets rubbed off.
The best way to make sure that happens is to print off your tattoo design and add in shading with a pencil. This way, you’ll know exactly where your shading needs to go, and you can use it as a reference when you go to actually tattoo the design.
Stay Consistent with Your Line Work
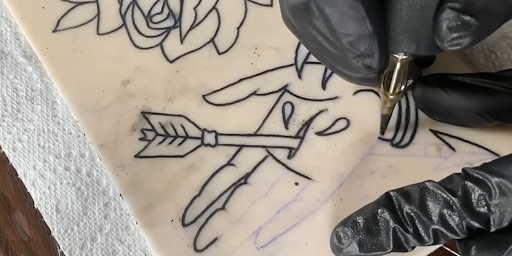
Line Work looks best when you’re consistent. This means focusing on staying at the appropriate depth the whole way through your tattoo (between 1-2mm deep in the skin).
You’ll also want to follow your stencil the whole way through so you always know exactly where to put your lines. If you don’t follow your stencil, you’re going to have issues with lines not matching up or the design looking distorted.
Remember to put a thin layer of Vaseline over your stencil to protect it from smearing while you’re working.
Note:
In the video, Brandon uses a 14 round liner (1214RL) by Kwadron, and he runs his machine at 8 volts.
Pro Tip:
You may need to pick up the needle in the middle of a line. Instead of completely saturating the line up to the point where you pick up the needle, you can “whip” the needles out before continuing the line.
Use Different Styles of Shading
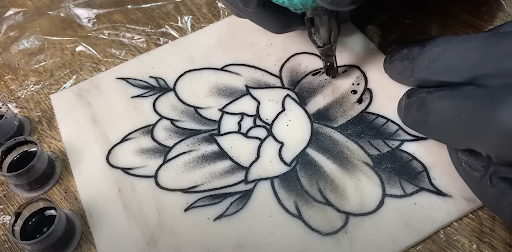
When trying to make a perfect tattoo, you want to make sure that you’re using all the fundamentals you need.
This includes the three shading techniques: whip shading, pendulum shading, and packing. In many tattoos, you’ll use all three, so you need to be able to control your mag needles correctly. Shading drills will help you build up the muscle memory you need to do these techniques properly.
If you don’t shade your tattoos well, the dark areas of your tattoos won’t look fully saturated, and they’ll fade fast.
Note:
Make sure your shading goes all the way up to your line work. This way, you can smoothly transition all the way from your black line work to skin tone.
Working with Gray Wash
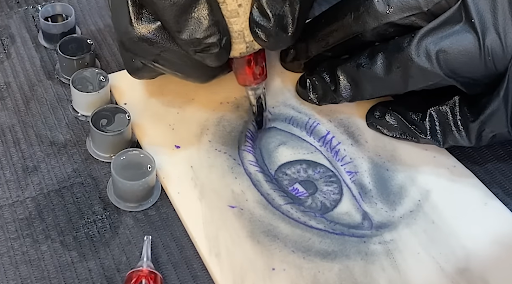
You can use gray washes to help make the transition from black ink to skin tone easier. You’ll use black ink in really dark areas and then move to lighter and lighter gray washes until you’ve created a smooth gradient.
Once you have all the really dark areas where you want them, clean your fake skin off before you go into the lighter shading.
If you’re using gray wash for a traditional tattoo, we recommend using ink caps of straight black, six drops, and three drops. If you’re doing realism, you’ll want more ink caps so you have more shades to work with.
Note:
In the video, Brandon uses a standard curved mag (1211CM) for shading.
Pro Tip:
You can shade tattoos using only black ink. This works better for traditional tattoos, when it’s important that you see the “dots” created by whipping out your needles quickly. This is sometimes called “pepper shading” or “stipple shading.”
Learn to Tattoo Without an Apprenticeship

In the past, learning in the shop through an apprenticeship was the only way aspiring artists could learn to do a perfect tattoo. Today, however, artists are skipping the apprenticeship to learn on their own time at home with the Artist Accelerator Program.
The world’s oldest and largest online tattoo course, the Artist Accelerator Program’s easy-to-follow, 9-step framework lets anyone go from complete beginner to professional tattoo artist without the year of grunt work or hazing.
Inside the program, you’ll be taught everything you’d learn in a traditional apprenticeship by professional tattoo artists and receive feedback on your art and tattoos in the program’s private online Mastermind community.
Over 2500 students have used the Artist Accelerator Program’s 9-step framework to break into the tattoo industry, with many opening their own studios or working in shops around the world.
If you’d like to see the framework they used, click here to learn more about the Artist Accelerator Program.


